 Skip to content
 Head Office Multi-Branch Settings
This guide explains the Settings in the Head Office Multi-Branch setup, exclusively available to the Head-Office account.
These settings are only accessible to Platinum customers with Multi-Branch enabled. If you wish to upgrade, please speak with your Account Manager for more information.
Accessing Multi-Branch Settings
1. Log into Your Multi-Branch Head Office Account
Upon logging in, the system will display by default a screen with your Companies (branches) linked to your Head Office. Note the two icons to the right-hand side of each company listed: the first icon, represented by an envelope, allows you to send an email from that branch, while the green icon enables you to log in to the branch directly from that screen.

2. Navigate to Settings
Using the left-hand side menu, click on Settings. This will expand into three subcategories:
Company Settings, Price Matrix, and Customer Portal.
Company Settings
This section contains information exclusive to the Head Office account user:

Start Date of Year
Enter the start date of your tax year. For example, the Australian tax year runs from 1 July to 30 June of the following year. However, corporations may adopt a substitute year of income, such as 1 January to 31 December. In the UK, on the other hand, the tax year runs from 6 April to 5 April of each year.
Company Name
Specify the store name for the Head Office. By default, it uses the name from your company profile. You can change it to any name you prefer. Note that this name is used for internal purposes and is separate from the name that appears on invoices, which is configured in the “Profile” section.

Use this article to Set up Your Company Profile for your Head Office account, and please note: when logged in from one of your branch accounts, you can edit the company details and profile with the relevant information for that branch. The system will use this information for invoices, statements, and other documents.
Branch Linking Code
This code is displayed exclusively in the Head Office branch’s Company Settings. It is used to link other branches to the Head Office by entering this code into their systems, enabling them to link their Workshop Software Branch account to your Head Office. Please refer to this article for more information:

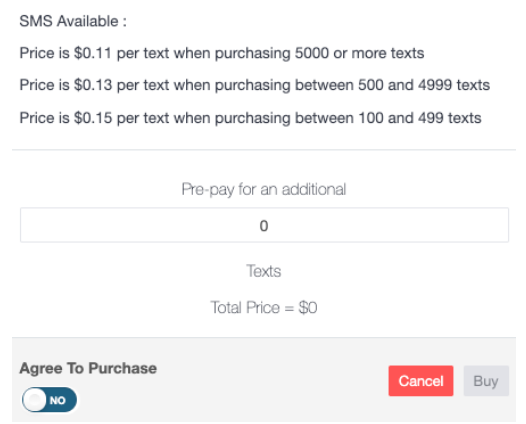
SMS Available
This section shows how many SMS messages are available across your network. It also allows you to purchase text messages and leave the balance available for all your branches. A valid credit card is required to purchase SMS messages. If you are paying your subscription monthly or yearly by credit card, your card details will already be on file. For more information, see the article How to purchase SMS and please note that prices are applied based on your country and currency indicated within this section in your account:
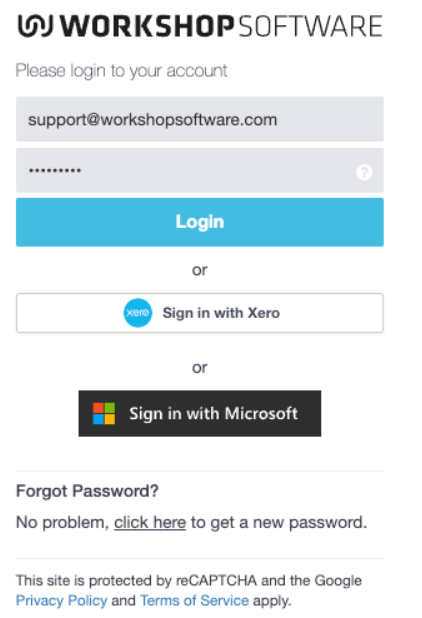
Force SSO For All Users (Single Sign-On)
This toggle enables Single Sign-On (SSO) for other users, allowing them to log into their accounts using either their Xero or Microsoft credentials:
By following these steps, you can efficiently manage the settings in your Head Office Multi-Branch setup. If you have any questions or need further assistance, please email us at support@workshopsoftware.com
We greatly value your feedback and invite you to share any suggestions about this feature in our Feature/Change Suggestions Portal. You are welcome to vote for existing ideas and participate in discussions, helping us to continuously improve and better serve your needs.
