 Skip to content
 This article explains how to manually add mechanic hours to an invoice in Workshop Software. We recommend using the mobile phone app to clock on and clock off for the most accurate time tracking.
See also: How to Clock Time on the Mobile App and The Mechanic Clock On Function.
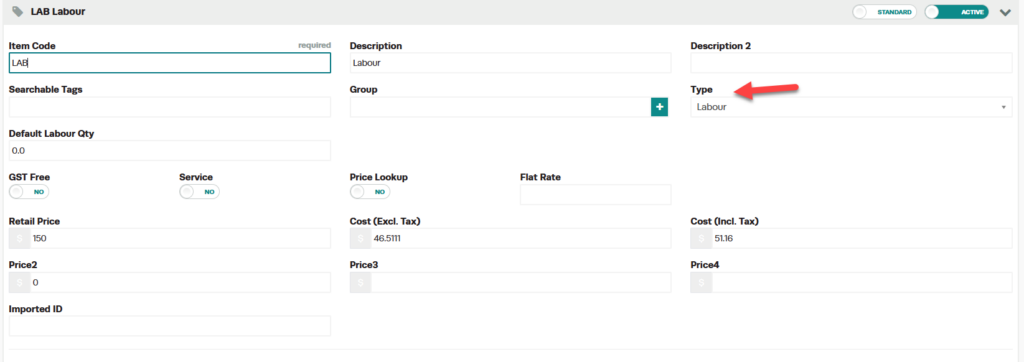
Step 1: Ensure a Labour Product Is on the Invoice
Mechanic hours can only be recorded on invoices that have a labour or service item. When entering a product, make sure the Type is set to Labour.
Step 2: Open Mechanic Times
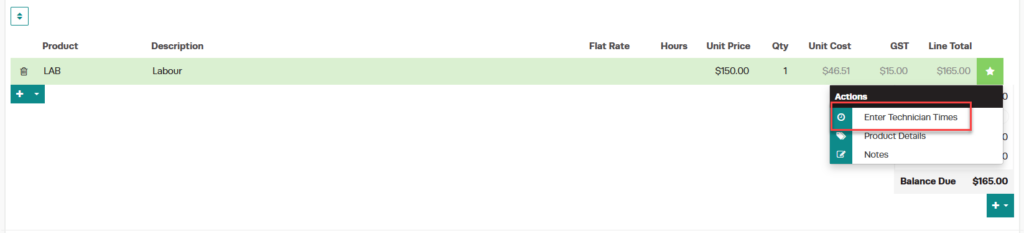
- Click the Star icon on the invoice and select Enter Mechanic Times from the drop-down menu.
2. To enter the times a mechanic has worked on a particular vehicle click on the green ‘Star’ icon at the end of the labour line. 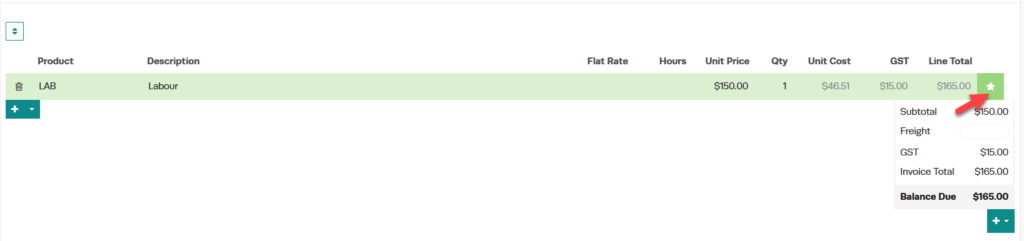
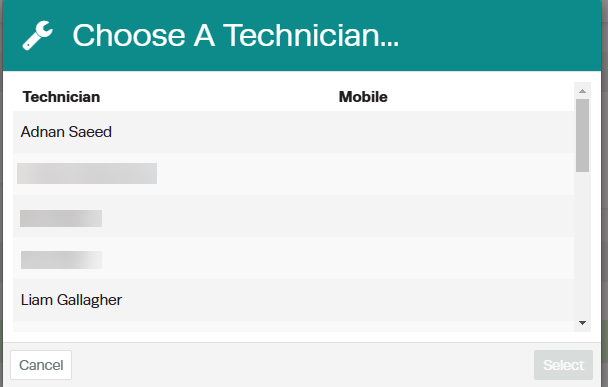
Step 3: Select the Mechanic
- Click the green magnifying glass icon to bring up a list of all mechanics you have as employees in Workshop Software.
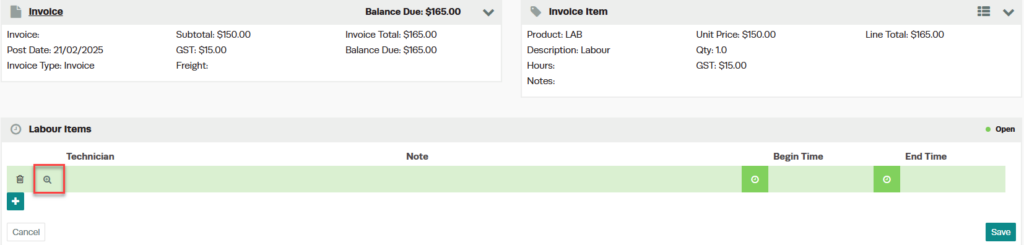
- Select the correct mechanic and click the green Select button.
Step 4: Enter the Begin and End Times
- Click the green Clock icon to the left of the Begin Time field, then click on the hour of the start time.
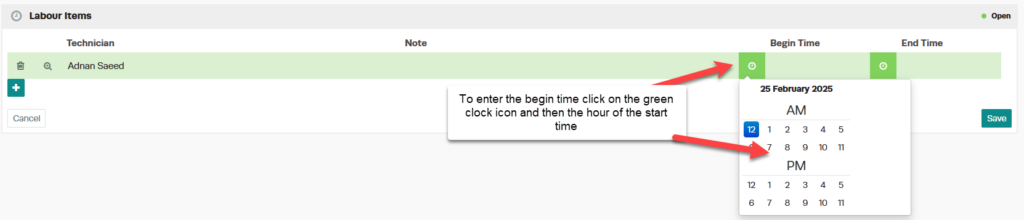
- Click on the minutes to enter the full begin time.

- Repeat the same steps to enter the End Time.

Step 5: Add Additional Mechanics or Time Entries
- If the same mechanic returns to do further work, or a second mechanic also worked on the vehicle, click the + icon to enter another line for additional time worked.


Step 6: Save and Review
- Once all mechanic times have been entered, click the green Save button.

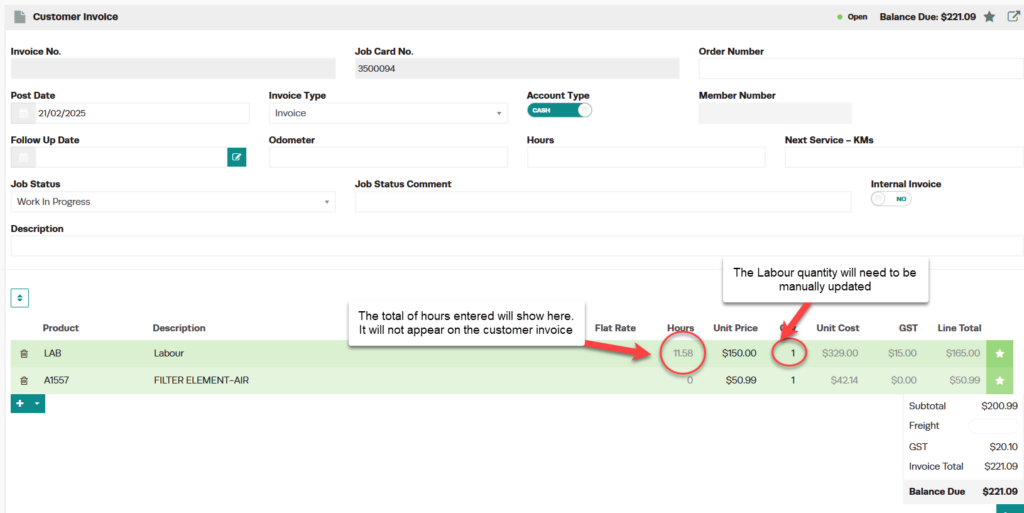
- The hours will be tallied and displayed in the top right of the screen. To go back to the invoice, click Invoice in the top left-hand corner.
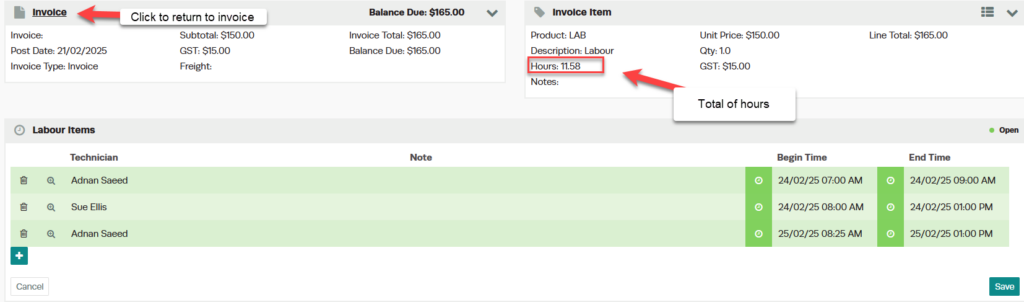
- The total amount of mechanic hours will be displayed in the invoice header.
Good to Know
- The mobile app provides the most accurate time tracking with automatic clock on/off.
- You can add multiple mechanic time entries to a single invoice for different mechanics or return visits.
- Mechanic hours help you compare quoted time versus actual time worked, which is valuable for profitability analysis.
