 Skip to content
 Crediting an invoice in Workshop Software allows you to reverse or adjust a previously completed Invoice. This is useful when a Customer returns a product or when an error needs to be corrected. This article explains how to apply an existing Credit to an Invoice.
Please follow the guide on how to create a Credit if you haven’t done so already.
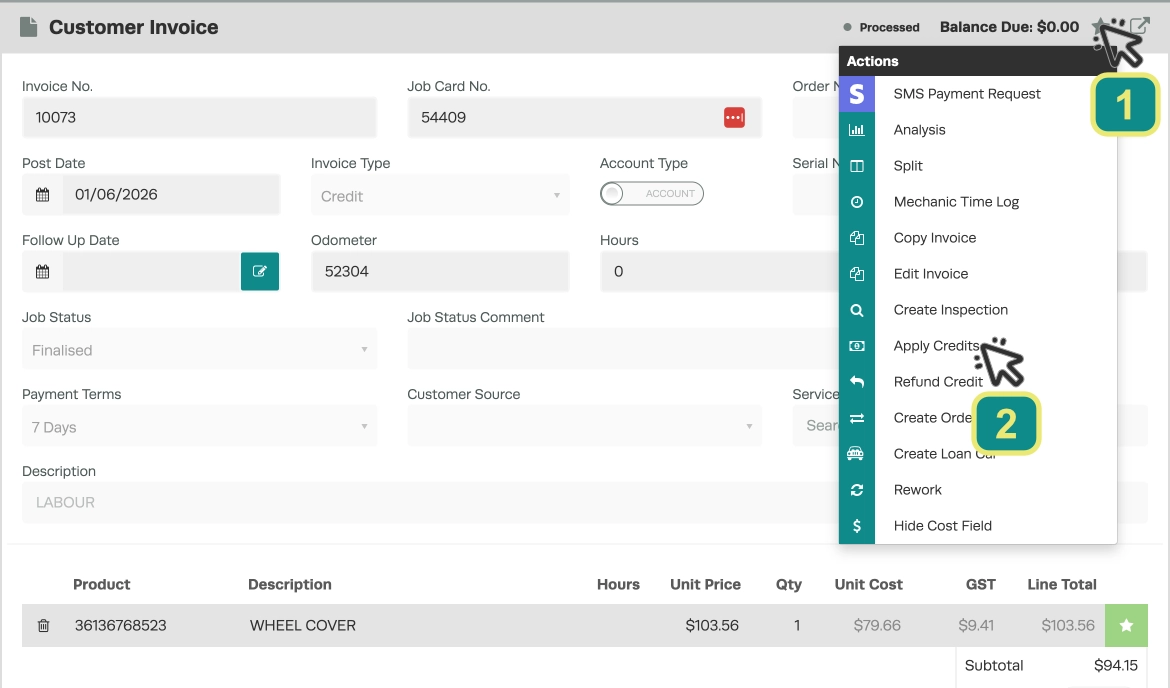
Step 1: Open the Credit
- Open the Credit you would like to apply.
- Click the Star (1) button next to the Balance Due field.
- Choose Apply Credits (2) from the drop-down menu.
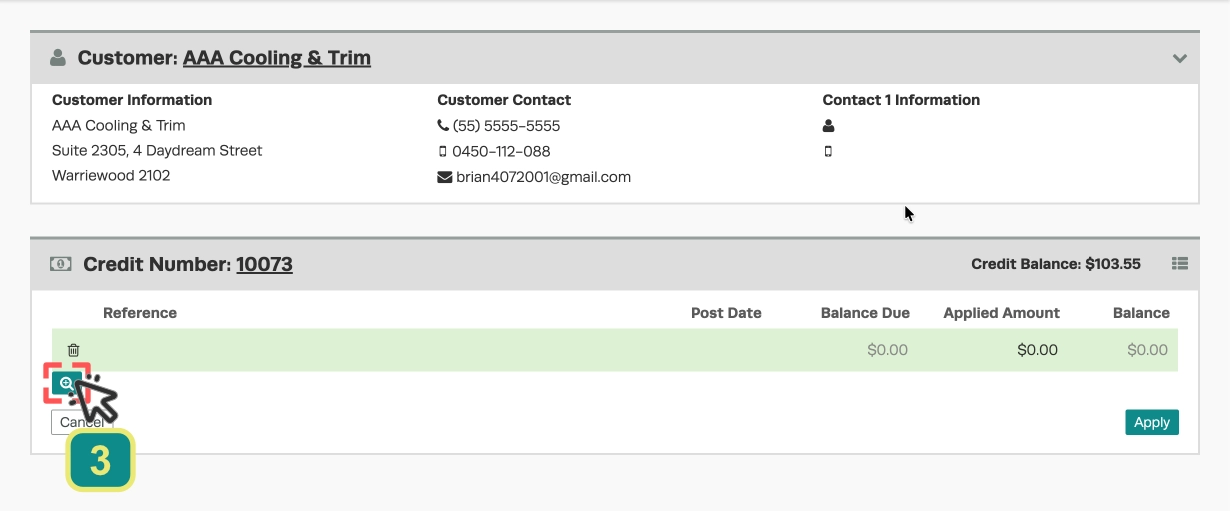
Step 2: Select the Invoice
- On the Apply Credit page, click the Magnifying Glass icon (3) below the reference section.
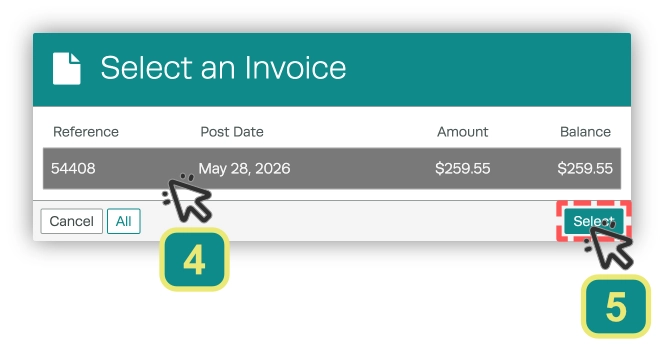
- Select the Invoice you would like to apply the Credit to (4).
- Click Select (5).
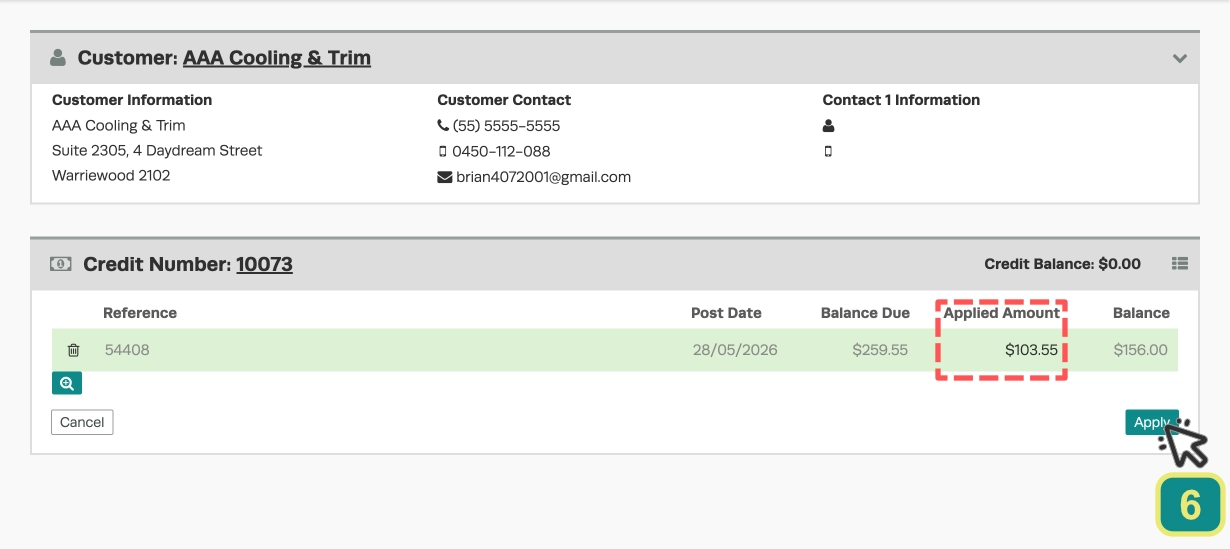
Step 3: Apply the Credit
- Click the box below Applied Amount and type in how much of the Credit you would like to apply to this Invoice.
- Press Apply (6).
Good to Know
- Double-check the details on your Invoice before finalising to ensure accuracy for your Customer and your records.
- You can apply a partial Credit amount if needed — the remaining Credit balance stays available for future use.
Frequently Asked Questions
Does a Credit Note sync to my accounting system?
If you have an Accounting Integration set up, Credit notes will sync automatically to your connected accounting software.
