 Skip to content
 A quote in Workshop Software is created the same way as a customer invoice — the only difference is that you change the invoice type to Quote before saving. This guide walks you through the full process.
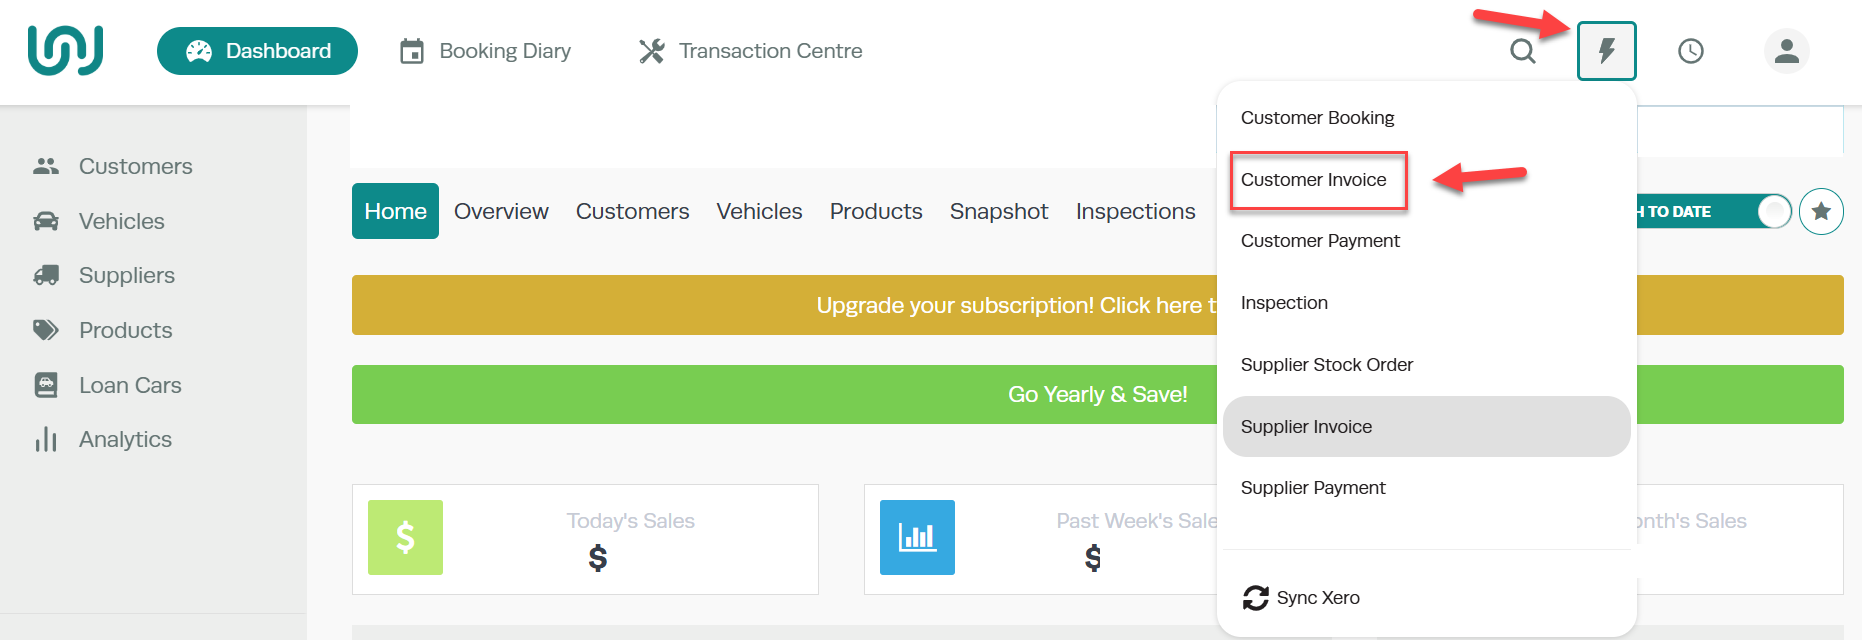
Step 1: Start a New Transaction
- Click the Lightning Bolt icon at the top-right of the page.
- Select Invoice/Quote from the dropdown menu.
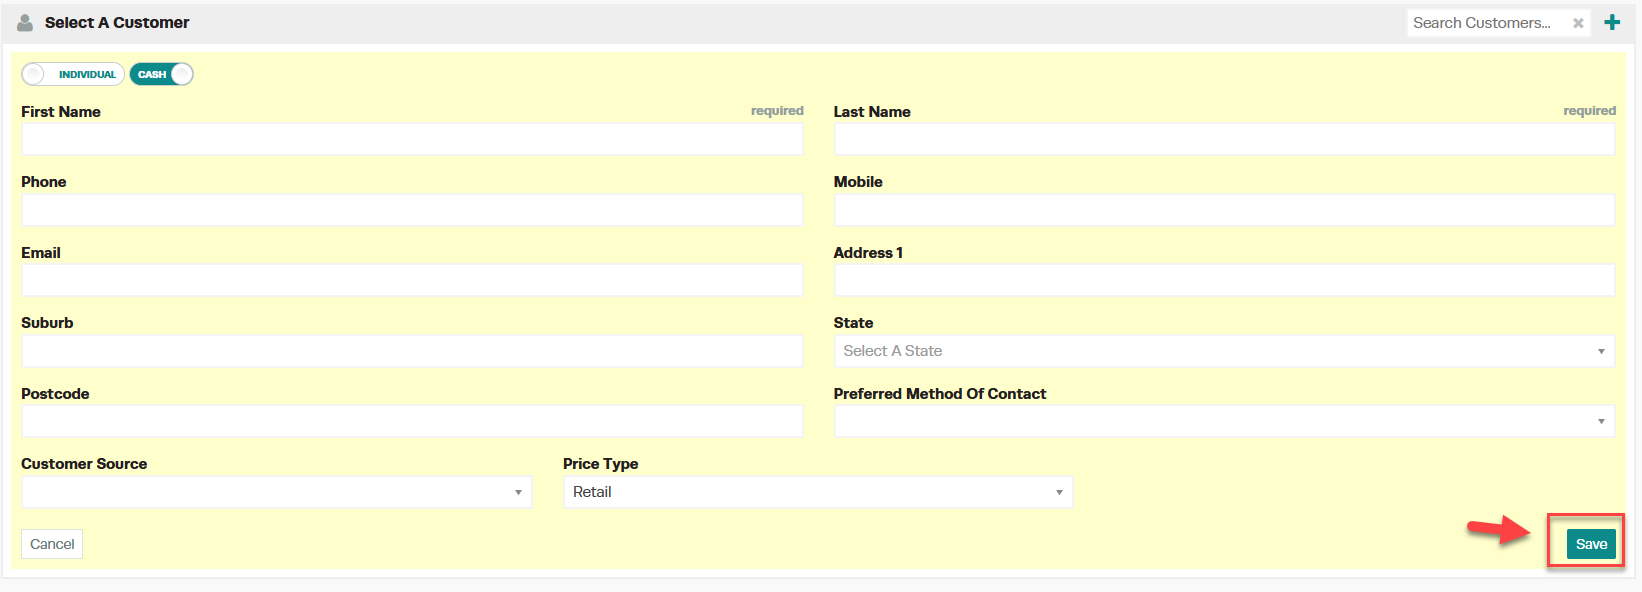
Step 2: Select or Create a Customer
Existing Customer
- Search for the customer by name in the search field.
- Double-click on the correct customer to select them.

New Customer
- Click the + icon at the top of the page, next to the search bar.
- Fill in the customer details:
- Individual or Company — select the customer type
- Cash or Account — select the payment type
- First Name & Last Name — required
- Phone numbers
- Address details
- Click Save once all details are entered.

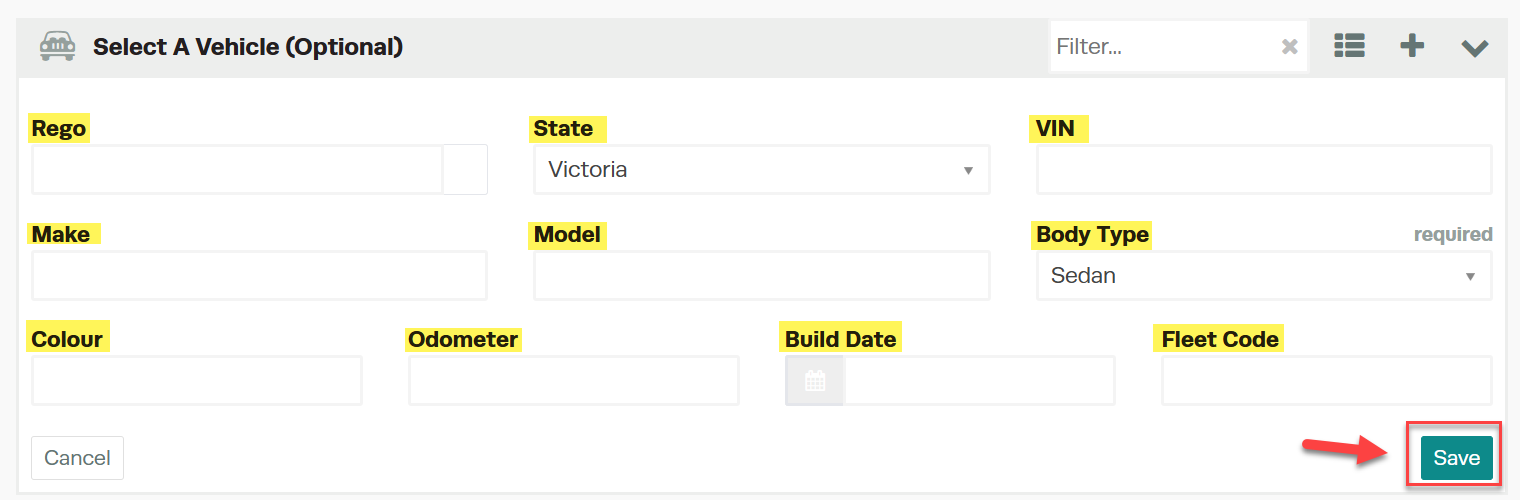
Step 3: Add a Vehicle
If the customer already has vehicles on file, select the correct one. If the vehicle is new, add it by entering the following details:
- Rego — required
- State (e.g. VIC, NSW)
- Make
- Model
- Body Type — select from the dropdown menu (required)
- Colour
- Speedo (odometer reading)
- Production Date — use MM/YYYY format
Click Save once all vehicle details are entered.
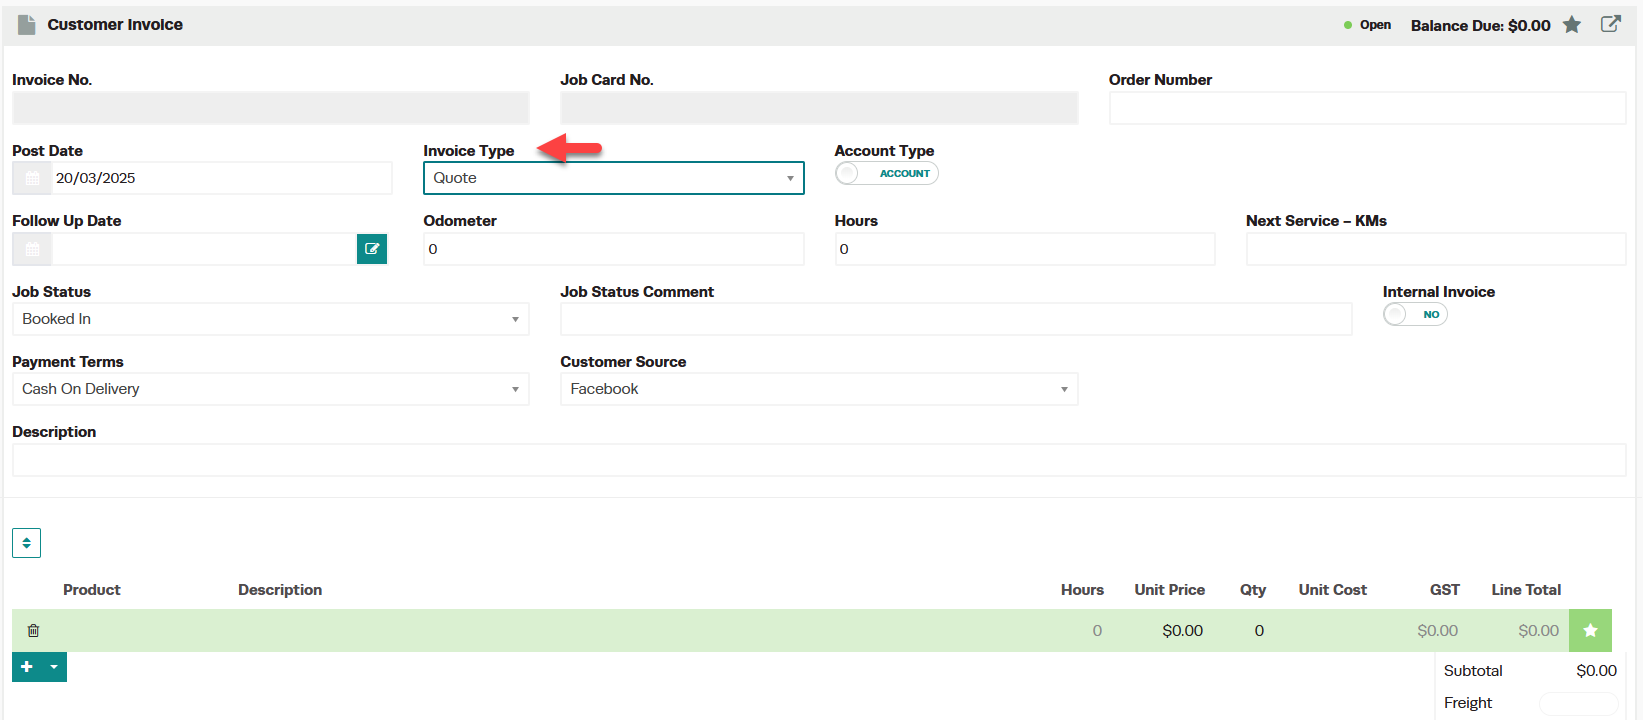
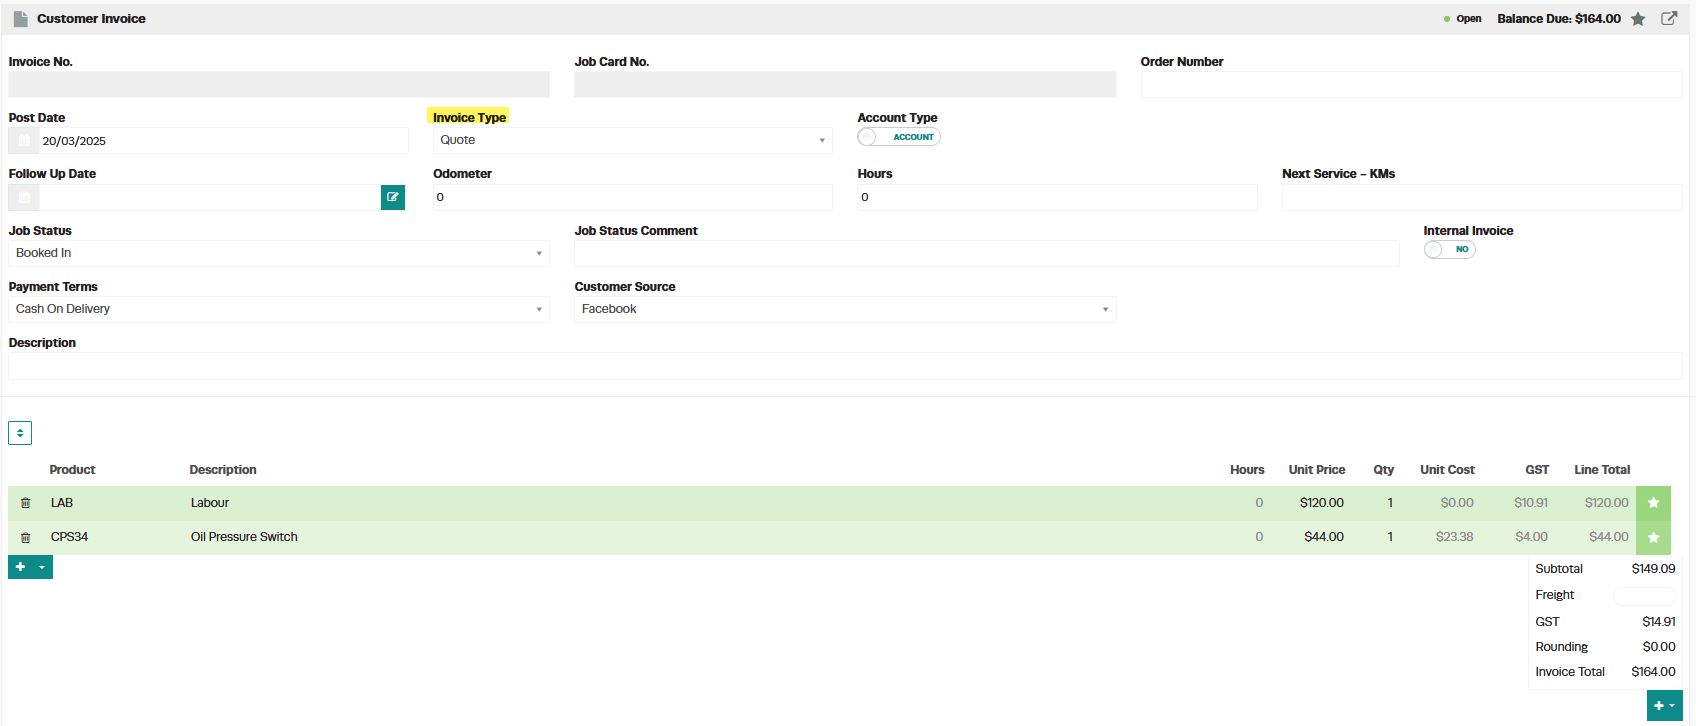
Step 4: Change the Invoice Type to Quote
- In the invoice screen, locate the Invoice Type dropdown.
- Select Quote from the dropdown menu.
Step 5: Enter Quote Details and Save
- Add the products, services, and notes for the quote.
- Click Save at the bottom-right of the page.
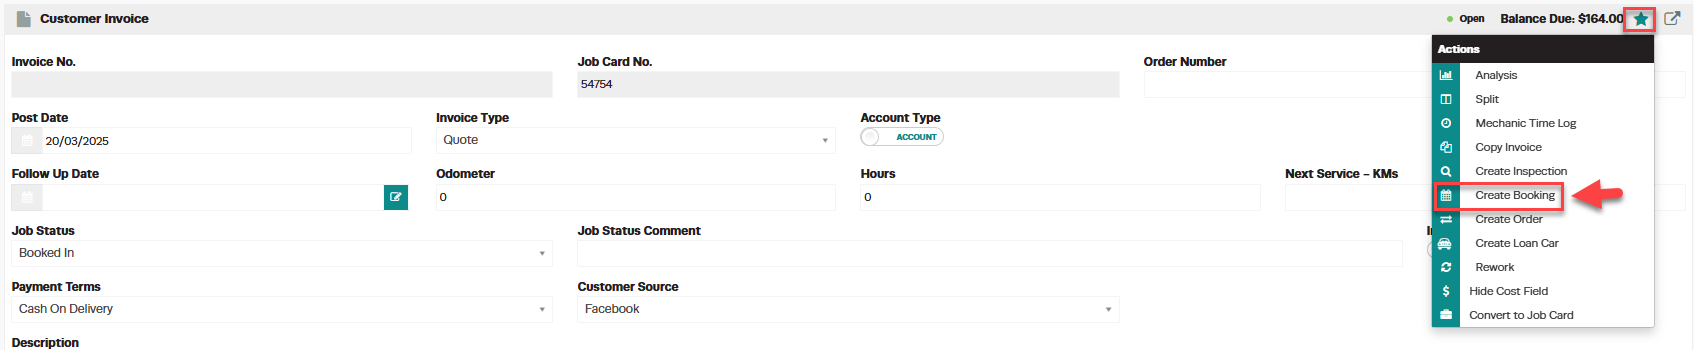
Step 6: Convert the Quote Later
The quote will now appear in the Transaction Centre. When the customer is ready to proceed, you can convert the quote to an invoice or booking directly from there.

Good to Know
- Quotes do not affect your revenue figures until they are converted to an invoice.
- You can duplicate, edit, or delete a quote from the Transaction Centre.
- To convert a quote to a booking, see Change a quote to a booking.
