 Skip to content
 Workshop Software allows you to upload attachments to a customer invoice and then email those attachments to your customer if needed. This article explains how to add and send attachments.
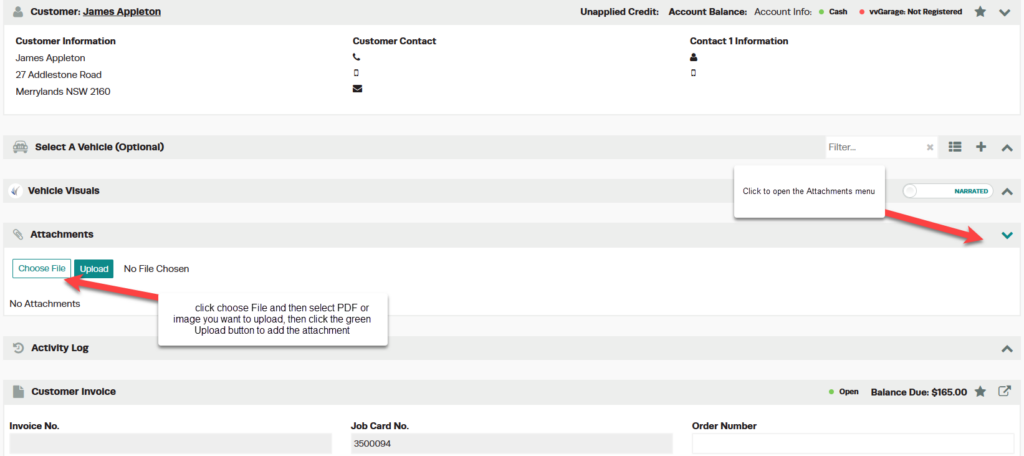
Step 1: Open the Attachments Section
- Open the invoice you want to add an attachment to — it must be an unprocessed invoice in your Transaction Centre. Attachments cannot be added to processed invoices.
- Below the Customer and Vehicle information, find the blue bar called Attachments.
- Click the down arrow on the far right to expand the menu.
Step 2: Upload the Attachment
- Click the blue Choose File icon to select the document you want to upload.
- Click the green Upload button.
Step 3: Email the Attachment to the Customer
- Once uploaded, the attachments will stay saved to the invoice.
- To email the attachment, click the Print icon at the far right of the blue Attachments bar.
- Click the blue Add Attachments button to include the attachments with the email.


- Click the blue Send with Email button. The email will be sent along with the attachment.


Good to Know
- Attachments can only be added to unprocessed invoices — you cannot add attachments to processed or finalised invoices.
- Uploaded attachments remain saved to the invoice for future reference.
- You can upload multiple attachments to a single invoice.
